
Carbonated water is a nice alternative to drinking plain tap water, especially for those who love soda but don’t want the sugar, calories, or chemicals. It’s also fairly inexpensive and can be found at almost any store. Brands like La Croix, Spindrift, and Bubly offer simple carbonated water with different flavors.
For someone drinking carbonated water regularly, it can get quite expensive. An 8-pack of La Croix costs around $3.00. This equates to about $0.37 per 12 oz. Even with some savings, it’s hard to drive the cost much lower than $0.25 per 12 oz when purchasing it in the store.
It’s possible (and very easy) to make carbonated water without purchasing cases or bottles at the grocery store. Making bubbly beverages at home saves money and produces less waste, and it only takes a minute to make.
Required Components
Many of the required parts can be purchased online at retailers like Amazon or Walmart. Local homebrewing shops also carry this equipment.
CO2 Tank
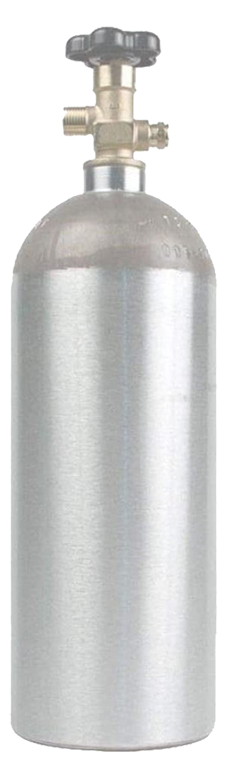
It’s the source of the bubbles. It will also be the most expensive investment on the trail to home carbonation. A new CO2 tank and be purchased and filled at a local beverage or restaurant supply store. Homebrewing shops also carry CO2 tanks of different sizes since they are used with bar taps and kegerators.
The good news is that once the tank is purchased, it can be recharged at a fraction of the cost. Recharging a 5 lb tank of CO2 costs between $10-$20 and can carbonate a 2 liter bottle of water over 150 times.
The CO2 tank MUST be beverage grade. Do not use any piece of equipment in this assembly that is not beverage grade. When in doubt, check the tank’s label.
A 5 lb CO2 tank purchased from Carbonic Service in San Jose, CA is used in the guide below.
Cost: $100 + fill
Regulator
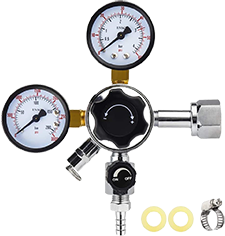
The regulator is responsible for taking the high pressure from the CO2 tank and reducing it to a lesser, steady pressure for the bubbly beverage. The regulator has one input which connects to the CO2 tank, and one output. Some regulators have an additional valve to open and close the output.
Cost: $40 on Amazon
Thread Seal Tape
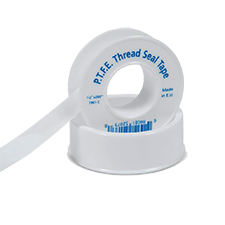
This tape is needed between the threads of the CO2 tank and the regulator. Apply thread seal tape around the threads of the CO2 tank before attaching the regulator. Thread seal tape is available at almost any hardware store and even homebrewing shops that sell carbonation equipment.
Cost: $3 on Amazon
Hose
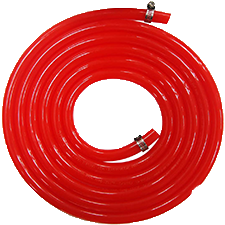
The hose is responsible for connecting the regulator to the ball lock disconnect. Once again, it should be beverage grade. The hose used in this guide was originally 10 feet in length. It was cut down to about 2 feet using a pair of scissors.
Cost: $13 on Amazon
Ball Lock Disconnect
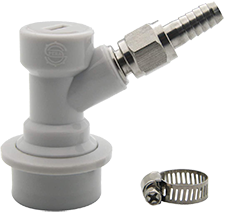
This handy connector allows for an easy seal between the regulator hose and the 2 liter bottle’s carbonation cap. It should come with a hose clamp that can be tightened with a Phillips screwdriver.
Cost: $12 on Amazon
Carbonation Cap
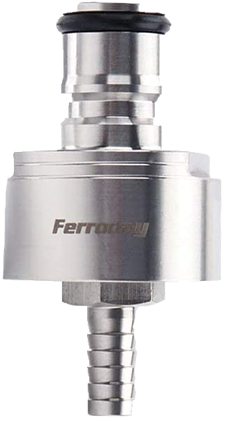
This cap is used to screw onto the 2 liter bottle. It easily attaches and detaches to the ball lock disconnect. Most caps come with one or two additional rubber gaskets that help seal the 2 liter bottle.
Another option is to purchase a carbonation cap for each 2 liter bottle of carbonated water used during the carbonation process. This eliminates dealing with the plastic cap, and the rubber gasket makes a superior seal during storage compared to the plastic cap that came with the 2 liter bottle. Only one is needed for this process.
Cost: $11 on Amazon
Assembly
Assembling the carbonation system is very straightforward. A few household tools will also help.
- Phillips screwdriver for the hose clamps
- Channel locks to tighten the regulator to the CO2 tank
- Scissors to cut the hose to the desired length
The finally assembly is shown below.

Now it’s time to carbonate the water!
Carbonate the Water
Step 1
Make sure the 2 liter bottle is filled with cold water to about three quarters full. The beginning of the curved top of the bottle is a easy-to-remember fill line.
For best results, refrigerate the water first before carbonation. The colder the water, the better the mixture.
Step 2
Remove the bottle’s plastic cap and replace with the Carbonation Cap. Slightly tighten the Carbonation Cab, and then gently squeeze the 2 liter bottle to remove excess air. Once the excess air has been removed, fully tighten the Carbonation Cap.
Removing excess air allows more CO2 into the mixture. More CO2 means more bubbles.
Step 3
Attach the Ball Lock Disconnect to the Carbonation Cap.
Step 4
Check the connections, fittings and tightness of the Carbonation Cap on the 2 liter bottle. Make sure the Regulator’s valve is tightly in the Off position.
Step 5
Open the CO2 Tank’s valve. This releases CO2 and pressurizes the Regulator.
If the regulator is not already pressurized, the leftmost middle gauge will move to show the amount of pressure within the CO2 tank.
Step 6
Open the Regulator. This will pressurize and expand the 2 liter bottle.
Step 7
(Optional) Adjust the regulator to the desired level of carbonation. Adjust the regulator pressure to somewhere between 25 and 35 PSI. Note that it is not recommended to exceed 35 PSI. Most 2 liter bottles cannot withstand more than 40 or 50 PSI when new.
Step 8
Turn the 2 liter bottle upside down and shake thoroughly to create the mixture. Continue shaking the inverted bottle for about 1 minute.
A good that sign that the water and CO2 are fully mixed is when large bubbles stop forming.
Step 9
Close the Regulator’s valve, then close the CO2 tank’s valve. Ensure both valves are tight to avoid leaks.
Step 10
Untwist the Carbonation Cap. Excess CO2 from the bottle and tubing will escape, which produces a hissing noise.
Enjoy!
Poor a nice glass of carbonated water, and then replace the original 2 liter bottle’s plastic cap. Keep refrigerated to ensure the CO2 remains in the water as long as possible.
